

Anyone else replace your purse with a giant tote after becoming a mom? About a month ago, I was in Target and saw a really cute purse that was on sale. I decided right then and there that now was the time to stop being the person who carries all of the things in my giant tote whenever I leave the house.
Ever since I started using MY purse, I’ve been thinking about making some sort of pouch to go with it. I hesitate to call it a wallet, but I guess that’s what it mostly is. I wanted it for my smaller items and for it to be big enough I could stick my phone inside if I ever needed.
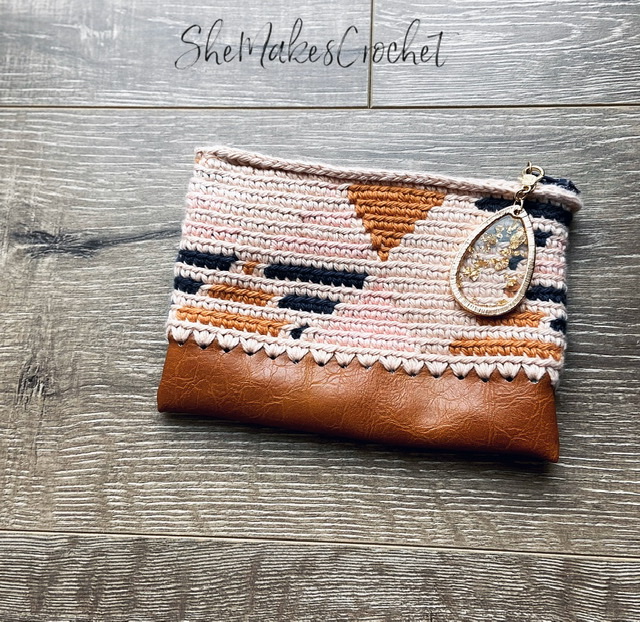
I had a piece of vinyl faux leather sitting around in my craft tub for a seriously long time and wanted to use that. I also was drawn to some specific colors. I wanted something geometric, but that’s it. This idea was just swirling around in my head without any real direction and then I quite suddenly figured it out and this project came together very quickly afterwards.
I created a graph and didn’t end up using the entire image because it was too big. But I love this design and the colors – I have some thoughts on growing this idea, if I ever get the time!

Geometric Zip Pouch
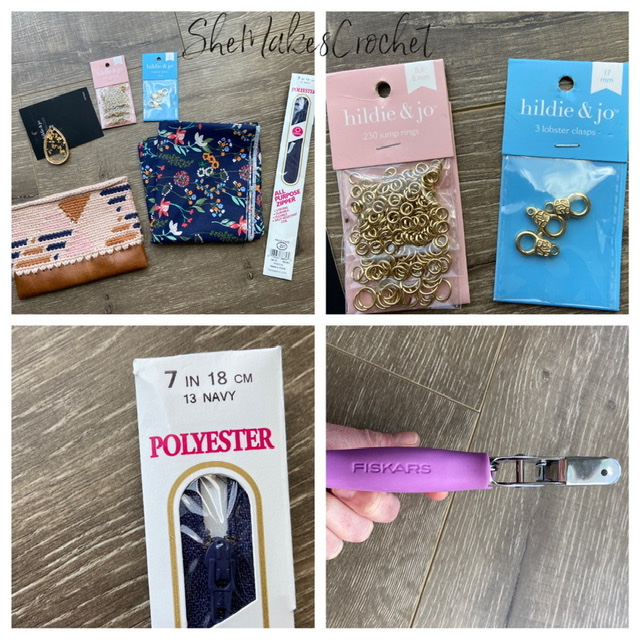
Supplies:
- Worsted weight yarn in 4 colors – I used I Love this Cotton: Dark Denim, Warm Blush, Taupe, Antique Gold
- 3.5 mm crochet hook
- Small hook to fit into the punched holes – I used a 2.25 mm
- Scissors
- Needle for sewing down yarn tails
- Stitch marker
- Vinyl faux leather – I got mine by the yard at JOANN Fabrics and Crafts
- Needle and sewing thread
- Ruler and pen
- Hole punch – my hole punch makes smaller than typical holes
- Optional – fabric, zipper, charm/zipper pull and hardware to attach as needed
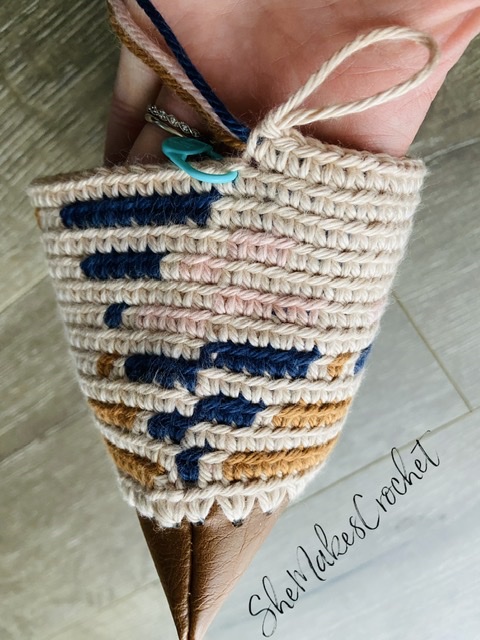
Finished Dimensions: My pouch is 6.5 inches wide by 4.5 inches tall.
Abbreviations and stiches used:
- SC single crochet
- BLO back loop only
- SS slip stitch
- CH chain
Pattern Notes:
This pouch is created using tapestry crochet. If you’ve never done tapestry crochet, it’s a method that allows you to do beautiful color work without having to constantly cut your working yarn and reattach a new strand. Instead, you carry all strands behind your work and work your stitches over those unused strands. It’s important to use a small hook for a nice, tight fabric and it’s important to work in the BLO.

When working a color change, at the last stitch before the new color, insert your hook and draw up a loop, drop your working yarn to the back of your work and pick up the new color, yarn over with the new color and pull through completing your stitch with the new color.
To achieve my design, you will work off a chart where each block on the chart denotes one stitch. Change colors as the colors change on the chart. The chart is read from left to right and when you reach the end of the row on the chart, you should also be at the end of your round of stitches – well technically, you’ll need to repeat the row for a total of two times in order to complete a full round of stitches. Then, you start the next round by starting the next row on the chart.
A final note, tapestry crochet is worked in continuous rounds. (I suppose you could join the rounds though, if you really wanted.) I’m not typically one to use stitch markers, but this is a case in which I always do and I highly encourage you to as well – you will want to mark the first stitch of each round because it can sometimes be difficult to keep track of where rounds end/begin as the pattern sort of shifts and jumps along that edge.
Pattern:
Create the bottom of the pouch

- Cut a rectangle of faux leather vinyl that’s 18 cm by 7.5 cm.
- Using a ruler and a pen, mark a small dot 1/2 cm from the edge and then every 1 cm after that along the entire width of the rectangle. Do this for the second long side/edge. Hint: you should have 18 marks on each edge.
- Using your hole punch, create a small hole in all of the spots you marked along both edges.
- Fold your rectangle in half (right sides to the inside) and using a needle and sewing thread, stitch the two short side edges closed and secure with a knot.
- Turn the rectangle right side out. Using the small hook, main color and being mindful to work loose, even stitches, insert the hook into each hole and work 2 SC stitches into every hole all the way around. SS to join to the first SC and CH 1.
Work the pattern following the chart
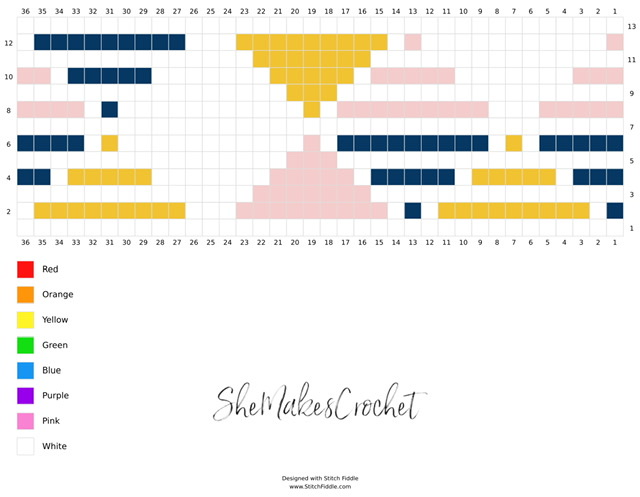
Note: There are 36 stitches on each side of the pouch and 36 stitches per row in the chart. So you will need to work each row of the chart twice in order to get all the way around your bag and back to your stitch marker.
Round 1: Pick up the remaining three strands – starting from this point on, you will crochet over the unused strands – working into the BLO, make your first SC stitch into the same stitch as the join, being sure to work over the unused strands for the remaining 3 colors. Also, be sure to mark this first stitch.
Note: It’s super thick, but I actually crochet over my yarn tails at this time as well! That’s optional, you can sew them down after you finish if you prefer.
- Round 1 continued: Continue working 1 SC into the BLO all the way around. Be sure to follow the chart, work over all the unused strands and change colors accordingly. Hint: the first round doesn’t have any color changes.
- Rounds 2-13: Continue working 1 SC into the BLO all the way around. Remove and place your stitch marker at the first stitch of each round. Be sure to follow the chart, work over all the unused strands and change colors accordingly. Hint: the last round doesn’t have any color changes, but continue to work over your unused strands.
Finish up the top edge
- Round 14: Cut all unused strands. Do NOT cut the main color as you still have one more round! You can cut these strands very short to avoid the need for sewing down ends as you crocheted over them significantly.
- Round 14 continued: I don’t know what this stitch is called – it’s like a SS DEC (and I have some pictures for reference below). I like it because it makes a little extra space which is useful when you need to stitch the lining into place. If you prefer, you could do a round of SS instead. To do my “SS DEC” stitch, you will work the stitch by inserting your hook into the same stitch you are on, pull up a loop, insert your hook into the next stitch, pull up a loop and pull through all loops on the hook. Subsequent stitches are again made by inserting your hook into the same stitch and pulling through a loop, then inserting your hook into the next stitch, pulling up a loop and pulling through all loops on the hook. Continue along in this same fashion until you get back around to the start. SS to join. Break yarn and sew down any tails.
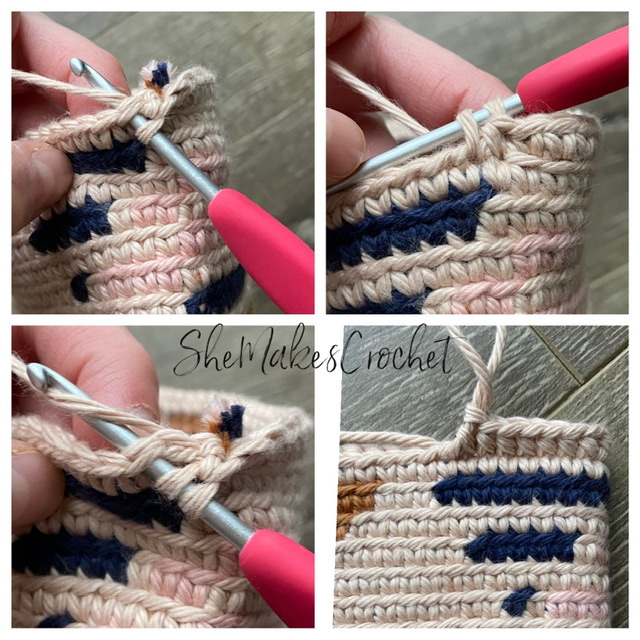
Images 3 and 4: insert hook into the next stitch, pull up a loop and pull through all loops on the hook.
Finishing touches
I have made numerous tapestry crochet style bags and they are very durable. They are also beautiful inside and out. As such, a liner is totally optional! One of my favorite bags only has a zipper sewn down at the top with no liner and it’s held up for years with regular use.

Make the liner

I debated making a complete tutorial for making and attaching a liner, but decided to keep it brief. Maybe one day I can try to do that in the future if you guys would like. Otherwise, you can find lots of tutorials if you do a google search.
- I used my bag to cut my fabric. You need two pieces and they need to be slightly bigger than the bag to allow for the hem.
- Attach the zipper to the top edges of the pieces of fabric. You need to make sure that you stitch the zipper such the the print will be on the INSIDE of the pouch. This part always confuses me because you are making the bag with the wrong side facing out and I’ve definitely made my fair share of inside out liners so double check!
- Make sure your zipper is opened at least half way and stitch along the three remaining edges of the pouch, again with the print facing to the INSIDE.
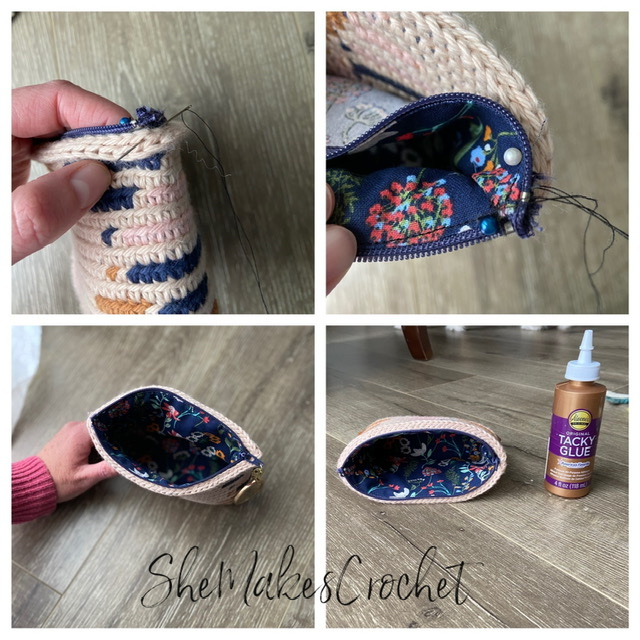
- Stitch the liner into the bag. Note: I tried something new and put a small amount of tacky glue along the bottom and then positioned my liner over the glue. I allowed it to dry before sewing along the top edge. It stiffened up the vinyl somewhat, so I had to kind of stretch it out and it’s still on the stiffer side, but I like how clean the liner looks so it doesn’t bother me. This may, however, not be ideal for you depending on the look you want so you may want to omit that part.
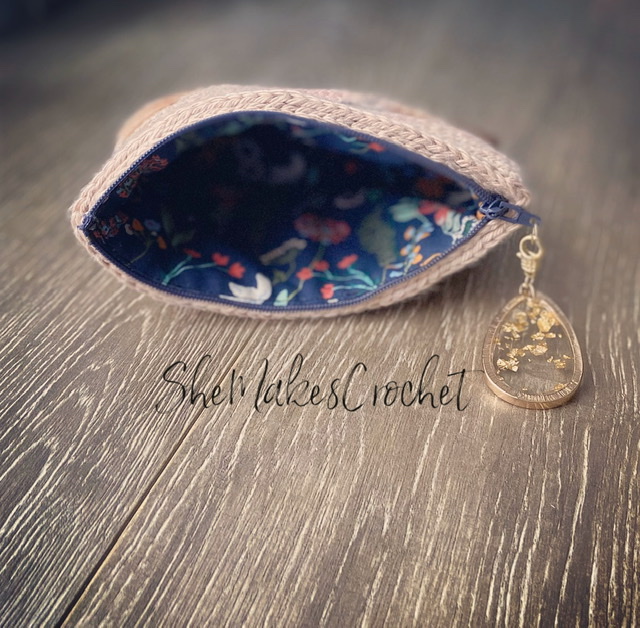
If you are using a zipper pull, or want to attach a charm or tassel do so now.
I love when people share their finished pieces. If you share your work on facebook or instagram, please tag me so I can see it @shemakescrochet.
You are free to share your finished work, to include selling your finished products, but please credit me – SheMakesCrochet – as the pattern designer. Please do not distribute this pattern or any portion of it, instead direct people to my blog. THANK YOU!


Wow!! Your pattern was shown in the ” Share a pattern” email and completely and immediately fell in love with the design. Hoping to make one very soon.
Thank you so much for the kind words! I hope you enjoy making one when you get the chance.
I’m sure I will. It’s beautiful. Thank for sharing
Am I able to buy the printed pattern at all?
I don’t have a printed pattern available for purchase. I’m sorry. I have something similar, but bigger for purchase here:
https://www.crochet.com/geometric-squared-pouch/p/18009D
je découvre votre site, j’adore vos ouvrages ! Merci pour le partage. Le nom “une fantaisie de point” en Français vous va très bien 😀
Thank you so much!