
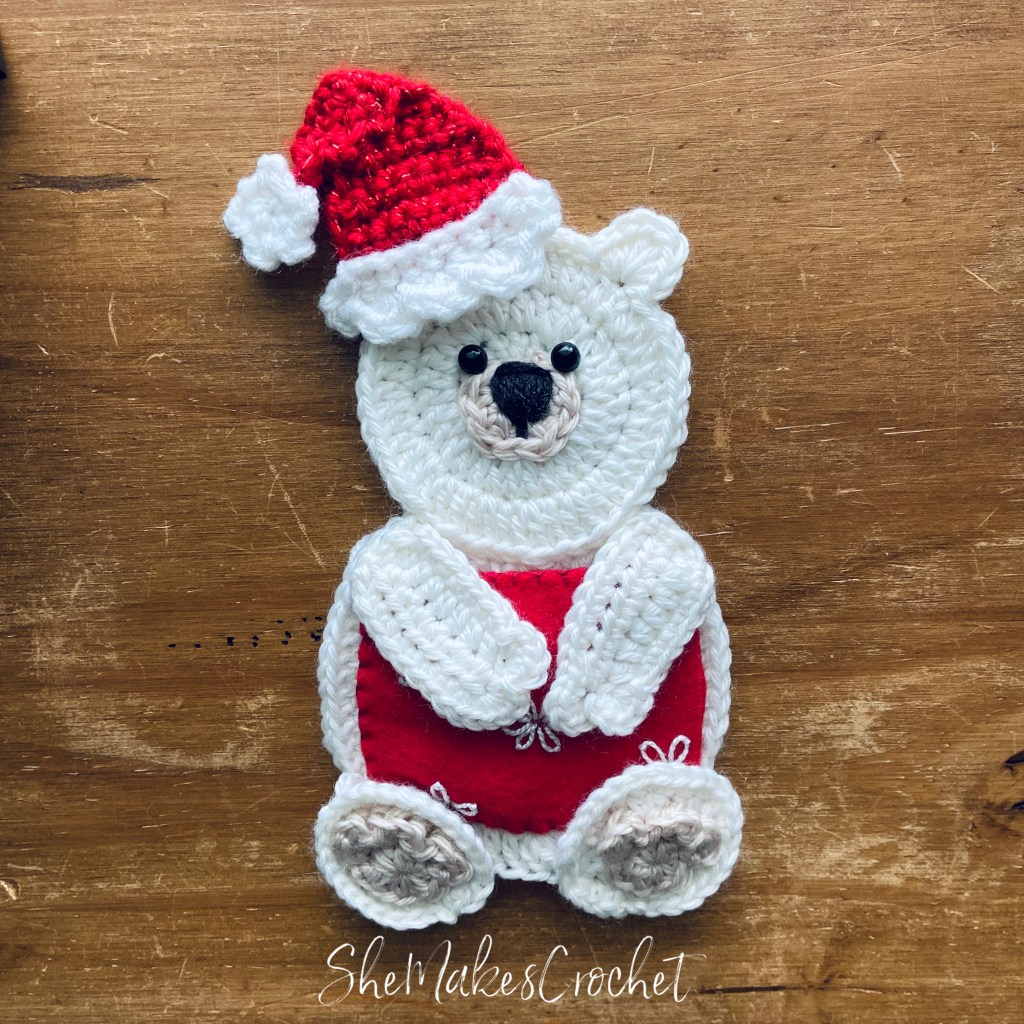
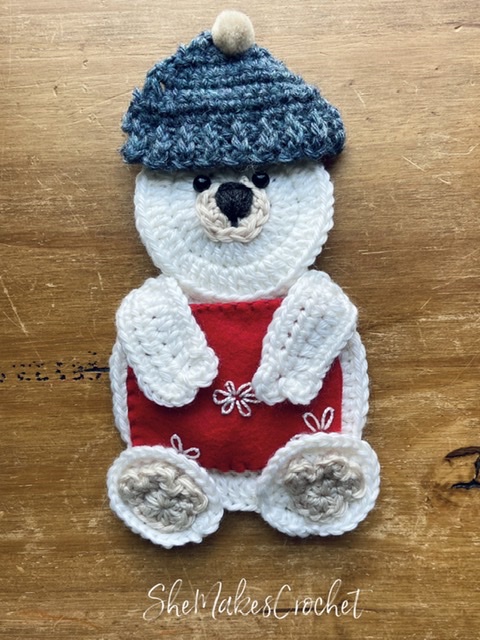
I enjoyed seeing my penguin again so much, I felt inspired to make a polar bear. Much like my penguin, I recommend adding a ribbon so this cutie can be easily repurposed. And also like my penguin, the hats are optional. Yes, I said hats. I made a little hat for this bear and something about it seemed off, but I also felt like it was adorable. After some suggestions to try a smaller hat, I decided to just use the same hat I put on my penguin and it was instantly a perfect match. I love all the variant’s of this bear, but the Santa hat version is my favorite.
Unlike my penguin, however, I decided to do the gift box in felt. I just really love adding different textures to crochet and think it elevates the whole thing. But of course, you could easily crochet two rectangles instead.
Supplies:
- Small amounts of yarn in various colors to achieve desired look.
I used worsted weight yarn from my stash – primarily Mighty Stitch, Wool of the Andes and Impeccable.
- White (Mighty Stitch) – bear and Santa hat
- Oyster (Mighty Stitch) – bear accents
- Icicle Heather (Wool of the Andes) – original hat
- Dark Charcoal (Impeccable) – nose and mouth
- Red Sparkle (Caron Simply Soft Party) – Santa hat
- 3.75 mm crochet hook
- Scissors
- Needle for sewing down yarn tails
- 6mm safety eyes
- Optional pom-pom for original hat
- Sheet of felt, matching embroidery thread and needle
- Ribbon, twine, yarn to create a loop for hanging, if desired
Finished Dimensions: Finished piece is approximately 6 inches tall from bottom of feet to the tip of the ear
Abbreviations and stiches used:
- CH chain
- SC single crochet
- HDC half double crochet
- SS slip stitch
- DEC decrease
Pattern Notes:
The beginning CH 1 or CH 2 at the start of rows/rounds does not count as a stitch throughout unless otherwise specified.
When sewing pieces together, I’ve got 2 hints:
- Use matching yarn for the top piece and stitch completely through the top piece, but only catch the top loops for the bottom piece (i.e. do not take the needle completely through the back piece). A bent tip needle is helpful for this, but is not necessary. Stitching pieces together in this manner prevents the contrasting yarn from showing on the backside.
OR
- Don’t worry about the contrasting yarn showing through on the bottom. When you finish, trace your bear onto the remaining half sheet of felt. Cut it out just a hair smaller and stitch it to the back of your bear using thread or embroidery floss!
Pattern Head:
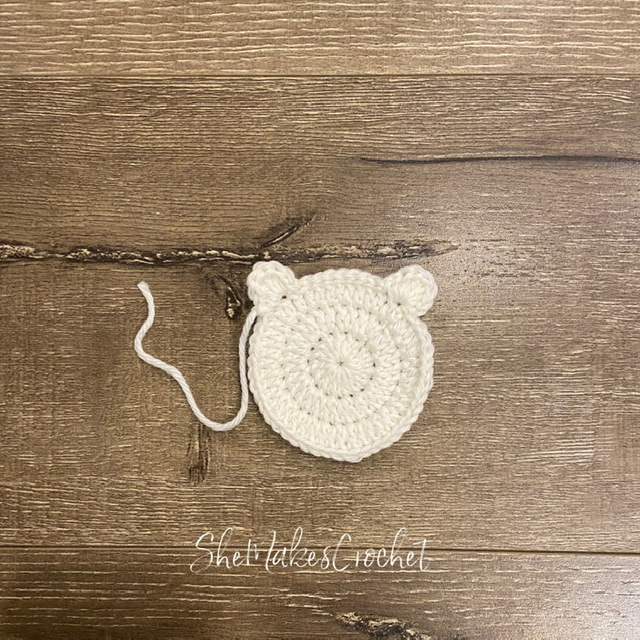
- Round 1: Magic ring, CH 2, 15 DC and SS to join to first DC. Pull ring taught. (15 DC)
- Round 2: CH 2, 2 DC in each stitch around, SS to join to first DC. (30 DC)
- Round 3: CH2, *DC, 2 DC in next* repeat all around, SS to join to first DC. (45 DC)
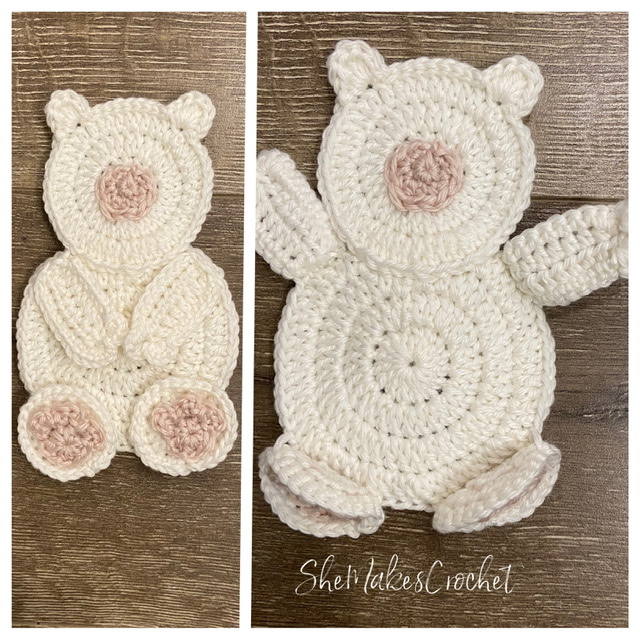
- If you are leaving the hat off, your bear will need ears so continue below:
- Round 4: CH 1 and in the same stitch – SC, HDC, 3 DC, HDC, SC – SS into the next stitch and the next 8 stitches. Then in the same stitch – SC, HDC, 3 DC, HDC, SC – SS into the next stitch.
- Fasten off and set aside.
Muzzle
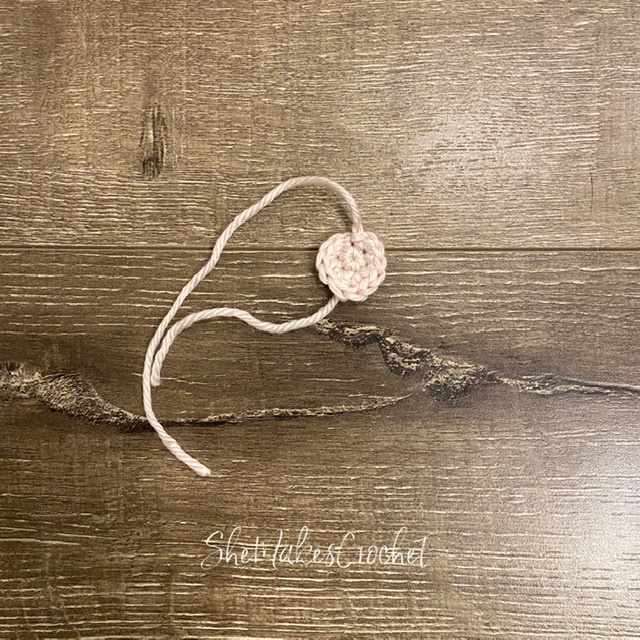
- Round 1: Magic ring, CH 1, 6 SC and SS to join to first SC. Pull ring taught. (6 SC)
- Round 2: CH 1, SC and SC in same stitch, SC and HDC in next stitch, HDC and DC in next stitch, DC and HDC in next stitch, HDC and SC in next stitch, SC and SC in last stitch. (12 stitches)
- Fasten off and leave a long tail for sewing. Set aside.
Pattern Body:
- Round 1: Magic ring, CH 2, 15 DC and SS to join to first DC. Pull ring taught. (15 DC)
- Round 2: CH 2, 2 DC in each stitch around, SS to join to first DC. (30 DC)
- Round 3: CH2, *DC, 2 DC in next* repeat all around, SS to join to first DC. (45 DC)
- Round 4: CH 2, *DC, 2 DC in next, DC* repeat all around, SS to join to first DC. (60 DC)
- Fasten off and leave a long tail for sewing. Set aside.
Pattern Arms: Make 2

- Row 1: CH 9, HDC in second CH from hook and each remaining. (8 HDC)
- Row 2: CH 1 and turn. HDC across. (8 HDC)
- Row 3: CH 1 and turn. SC across. Then work a second SC into the last stitch. Rotate work a quarter turn and working into the raw short edge – all in one space make 5 SC, SS and all in one space make 5 SC, SS. Rotate work a quarter turn and SC in the 8 stitches across.
- Fasten off and leave a long tail for sewing.
Pattern Legs: Make 2
- Round 1: Magic ring, CH 1, 9 HDC and SS to join to first HDC. Pull ring taught. (9 HDC)
- Round 2: CH 1, 2 HDC in each stitch around, SS to join to first HDC. (18 HDC)
- Round 3: CH1, *SC, 2 SC in next* repeat all around, SS to join to first SC. (27 SC)
- Fasten off and leave a long tail for sewing.
Foot Pads – Make 2

- Round 1: Magic ring, CH 1, 9 HDC and SS to join to first HDC. Pull ring taught. (9 HDC)
- Round 2: CH 1, 3 HDC and SS in same stitch, then in next stitch make – SS, 3 HDC, SS – and in next stitch make – SS, 3 HDC, SS.
- Fasten off and leave a long tail for sewing.

The brim of the hat is worked using what I’m calling a half slip stitch – HSS. I’m not sure what the real name is or if there even is one. It is made as it sounds by yarning over, inserting into the next stitch and pulling up/through all loops as if you are making a slip stitch. Or said another way. Yarn over like you would when making a HDC and then make a SS as usual. Hence my name. The reason I like this is because you will have a nicely pronounced third loop to work into in order to create a ribbed texture.
- Row 1: CH 4, HSS in second CH from hook and remaining two CHs. (3 HSS)
- Row 2: CH 1 and turn. HSS in the third loop of each stitch across. (3 HSS)
- Rows 3-17: Repeat Row 2
- CH 1 and rotate work one quarter turn. Work 17 SC evenly spaced along the raw edge.
- Row 18: CH 1 and turn. Skip the first stitch and SC into the next (creating a decrease), DEC, SC 9, DEC, DEC. (13 SC)
- Row 19: CH 1 and turn. Skip the first stitch and SC into the next (creating a decrease), SC 9, DEC. (11 SC)
- Row 20: CH 1 and turn. SC across. (11 SC)
- Row 21: CH 1 and turn. Skip the first stitch and SC into the next (creating a decrease), SC 7, DEC. (9 SC)
- Row 22: CH 1 and turn. Skip the first stitch and SC into the next (creating a decrease), DEC, SC 1, DEC, DEC. (5 SC)
- Row 23: CH 1 and turn. Skip the first stitch and SC into the next (creating a decrease), SC, DEC. (3 SC)
- Fasten off. Use thread to stitch a pom-pom at the top, if desired.
Pattern Santa Hat: (Optional)
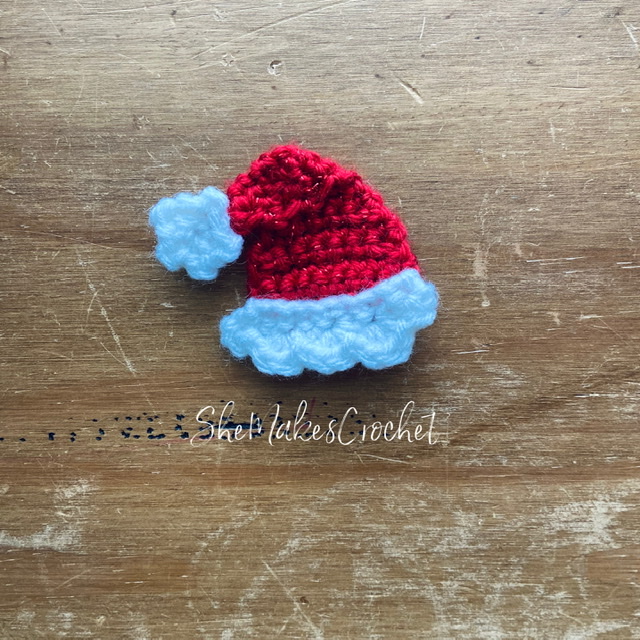
Head on over to my Penguin Gift Card Holder (Ornament) Pattern and come back here.
Gift Box:
Cut two rectangles 2.5 inches tall by 3.25 inches wide and stitch together along three sides. You’ll want to leave one of the short sides open. I chose to embroider some details before using a blanket stitch to sew around the three sides. I also deliberately made my box so that you can clearly see the gift card poking out of the side. You can adjust these dimensions as you prefer.
Putting It All Together:

Remember the options for stitching that I provided earlier. You need to decide if you plan to line the back of your bear with a piece of felt or not. If not, I recommend sewing mindfully so you don’t have contrasting yarn showing through on the back.
- Using the above image as a guide. Stitch the head onto the body. I overlap my head onto the body – so the bottom of the head is attached along the third row of the body.
- Embroider a nose and mouth and stitch the muzzle into place – if you are covering the back of your head, I think it’s easier to attach the muzzle first and then embroider through all layers.
- Attach safety eyes. I like my eyes touching the muzzle.
- Stitch the arms into place. My arms come right up to the head. You need to stitch the top of the arm to the perimeter of the body only. See the below images.
- Stitch the foot pads into place and attach the legs to the body. Just like with the arms, stitch the leg to the perimeter of the body. My leg overlaps the body so the perimeter of the body was hitting the middle of my leg (and that’s fine!). You just need the top open to fit the gift card. See the below images.
- Attach the gift box/card holder to the belly of the bear. I recommend using embroidery floss. If you crocheted rectangles, use yarn. You could consider trying glue or Velcro strips. The legs and arms provide some staying power so you don’t need a lot of stitches to tack it down.
- If using the hat, attach to the top of the head.
Attach a ribbon at the top to repurpose your adorable polar bear as an ornament after he makes his special delivery.

Optional: I highly recommend making a second head or even some smaller crochet circles to cover the back post of the safety eyes. Especially if you do not plan to attach felt to the back. He’s too cute to have hard plastic poking out of the back.
Optional: Trace your bear onto a piece of felt and cut out just a hair smaller. (Don’t bother tracing around the ears.) Position on the back of your bear and use embroidery floss or thread to stitch around the perimeter. You could also glue into place, though I prefer to not use glue with crochet.

I love when people share their finished pieces. If you share your work on facebook or instagram, please tag me so I can see it @shemakescrochet.
You are free to share your finished work, to include selling your finished products, but please credit me – SheMakesCrochet – as the pattern designer. Please do not distribute this pattern or any portion of it, instead direct people to my blog. THANK YOU!


1 thought on “Polar Bear Gift Card Holder (Ornament)”